How it works
I recently had the chance to compile a (semi-)passive OSINT (Open Source Intelligence) report for a client. I used recon-ng as a basis for gathering information and automatically querying multiple sources of information, so here is a blog post about it.
OSINT means that you try to figure out information about a company, its systems and employees mostly by querying publicly available external sources while avoiding to contact your target directly. This has the big advantage that your target will not know what you are doing. You query search engines, LinkedIn, Github, execute DNS and reverse DNS queries, etc. for employee and company information. Domains, hostnames, email adresses of employees and public visible code repositories all provide useful information that can be brought to use in later stages of an attack.
There are various tools that help you with info gathering (besides Google) and recon-ng is one of these tools. There are definitely more options available and you might get different information with different tools. However, since recon-ng saves its data in a SQLite database, its easy to manage and export for use in other tools. It is also easily extendible with python modules.
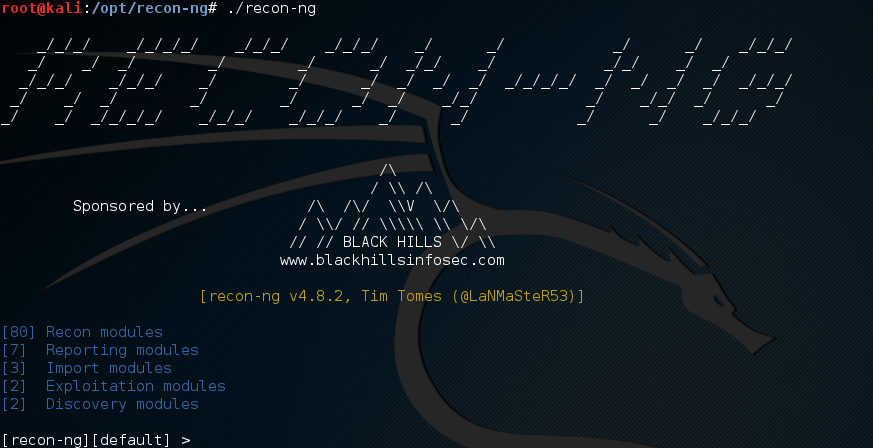
If you use Kali linux, recon-ng comes already preinstalled. If not, download it from GitHub and install the requirements. You can then execute it from the command line:
~# ./recon-ng
As soon as you start recon-ng it opens an interactive shell. Here you can make use of recon-ng comands and a variety of different modules. You will probably start out with a small information base, then make use of and combine the different modules of recon-ng to gather more and more knowledge.
To let recon-ng create an initial SQLite database file, you first have to create a workspace. I’m using the german credit institute “Deutsche Bank AG” as my target here (- no, I am not related to them). I name our new workspace accordingly.
[recon-ng][default] > workspaces add DeutscheBankAG
[recon-ng][DeutscheBankAG] >
When you start recon ng, you can swith to that workspace by using workspaces select DeutscheBankAG and you can list all your workspaces with workspaces list or delete a workspace with workspaces delete.
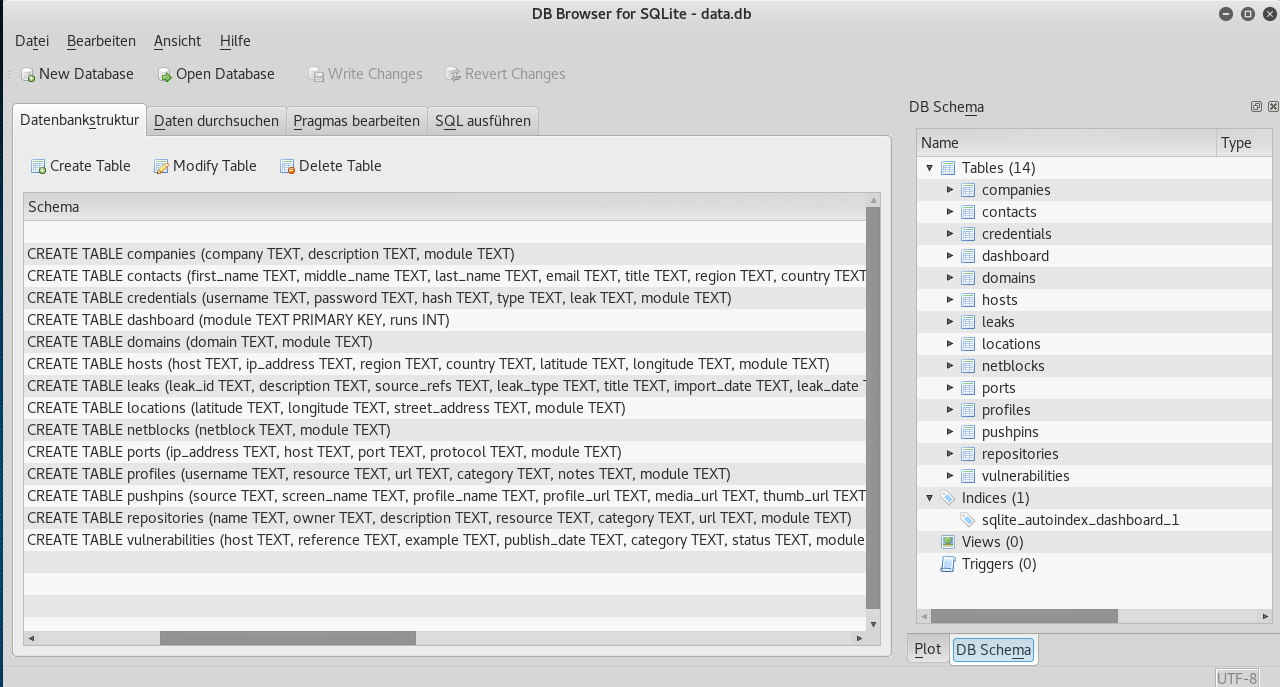
Now that you created a workspace, open a shell and visit \\\~/.recon-ng/workspaces/DeutscheBankAG/. You should find an sqlite database file there (data.db). Open it with sqlitebrowser or another sqlite viewer. You will notice the different tables and the database structure. This is how recon-ng organizes its data.
root@kali:~# cd ~/.recon-ng/workspaces/DeutscheBankAG/
root@kali:~/.recon-ng/workspaces/DeutscheBankAG# sqlitebrowser data.db
Within recon-ng, you can display information from the recon-ng database by using the “show” command. E.g. show hosts shows you all information about hosts that you gathered so far in the hosts table. show contacts shows you the content of the contacts table and so on.
You can also execute custom queries by using the query command.
query SELECT \\\* FROM contacts
will basically give you the same result as show contacts. You can use the whole SQLite sytax here and delete or add rows, though recon-ng provides more comfortable commands for some of these CRUD operations (e.g. add a row to a table can also be done by the add command). Note that you are also able to insert information in the database through other programs or sources by simply working with the database file. You can also write your own recon-ng modules. It’s this kind of flexibility that makes recon-ng a great tool. But let’s look at how recon-ng works conceptually.
Basically, recon-ng takes information from one of the tables, tries to find more information by querying some kind of service(s) and puts it in the same or different tables. E.g. it takes a hostname and queries DNS for the corresponding ip adress(es). It might also take a username and query for GitHub, LinkedIn and other user profiles. Or you might query vulnerability databases to look for known vulnerabilities on your targets website. recon-ng modules reflect these operations by its directory structure and naming conventions. All modules in the directory contacts-profiles will take information from the contacts table, try to gather more info about those entries, and put it into the profiles tables. The structure pattern is source-destination. You can get an impression of available modules by using show moduleswhich hopefully gives you a nice long list. You can search recon-ng modules from its command line easily by using the search command. E.g.
[recon-ng][DeutscheBankAG] > search  contacts-
[*] Searching for 'contacts-'...

Recon
-----
  recon/contacts-contacts/mailtester
  recon/contacts-contacts/mangle
  recon/contacts-contacts/unmangle
  [...]
Shows you all modules that make use of information from the contacts-table.
To query some of the external services recon-ng makes use of, you might need an api key. You can find more information on where and how to get at least some of these keys on recon-ng’s website. In my experience, however, many api keys required payment or were not so easy to get. But in some cases, you might still have half-automated ways to query services and recon-ng allows you to integrate custom modules to get creative.
You can use a module with the use statement:
[recon-ng][DeutscheBankAG][default] > use recon/companies-contacts/bing_linkedin_cache
Use tab for autocompletion. If the module name is unique, you can just do
[recon-ng][DeutscheBankAG][default] > use bing_linkedin_cache
And if you want to get more info about a module, you can use show info, which gives you a detailed description and info about available module options:
[recon-ng][DeutscheBankAG][bing_linkedin_cache] > show info

      Name: Bing Cache Linkedin Profile and Contact Harvester
      Path: modules/recon/companies-contacts/bing_linkedin_cache.py
    Author: Joe Black (@MyChickenNinja) and @fullmetalcache

Description:
  Harvests profiles from LinkedIn by querying the Bing API cache for LinkedIn pages related to the
  given companies, and adds them to the 'profiles' table. [...]

Options:
  Name        Current Value  Required  Description
  ----------  -------------  --------  -----------
  LIMIT       0              yes       limit total number of pages per api request (0 = unlimited)
  SOURCE      default        yes       source of input (see 'show info' for details)
  SUBDOMAINS                 no        subdomain(s) to search on LinkedIn: www, ca, uk, etc.

Source Options:
  default        SELECT DISTINCT company FROM companies WHERE company IS NOT NULL
  <string>       string representing a single input
  <path>         path to a file containing a list of inputs
  query <sql>    database query returning one column of inputs

Comments:
  * Be sure to set the 'SUBDOMAINS' option to the region your target is located in.
  * You will get better results if you use more subdomains other than just 'www'.
  * Multiple subdomains can be provided in a comma separated list.
Options are set via the setcommand, e.g. set LIMIT 10 sets the LIMIT option to 10.
You can find more info on recon-ng usage on the project page.
So after all this explanation and introduction, let’s start using recon-ng.
Use it on tech
First, create a workspace. As an example, I chose “Deutsche Bank AG” (Note: I do not have any personal reason to chose them, they just make a nice testcase.)
Let’s start with a very simple piece of information: The domain name deutsche-bank.de. We add it to the domains table:
[recon-ng][DeutscheBankAG] > add domains
domain (TEXT): deutsche-bank.de
And we also add the company name to the companies table:
[recon-ng][DeutscheBankAG] > add companies
company (TEXT): Deutsche Bank AG
description (TEXT):
[recon-ng][DeutscheBankAG] >
If we query our hosts table, it is still empty. Now we use the domain to figure out some hosts of the company by querying Bing web search via the domains-hosts/bing_domain_web:
[recon-ng][DeutscheBankAG] > use recon/domains-hosts/bing_domain_web
[recon-ng][DeutscheBankAG][bing_domain_web] > run

----------------
DEUTSCHE-BANK.DE
----------------
[*] URL: https://www.bing.com/search?first=0&q=domain%3Adeutsche-bank.de
[*] [host] finanzberater.deutsche-bank.de (<blank>)
[*] [host] www.deutsche-bank.de (<blank>)
[...]
-------
SUMMARY
-------
[*] 17 total (17 new) hosts found.
Our hosts table now looks a lot better and we just started. You might get additional hosts by using Google search (which may block you and send captchas after a while, which is why I always use Bing first). You might also want to make use of the brutefoce-module for subdomains or top-level domains. These modules include a list of common subdomains like db or tools or dev and top-level domains for many countries. Downside of bruteforcing top-level domains is that the results you gather that way may not belong to your target. This is always something to keep in mind, since you want to keep your data in scope. More ofen than not you will find yourself manually verifying at least some of the results you retrieve via automation.
For our small tutorial we stick with what we found through Bing. Now let’s resolve those hosts to ip addresses:
[recon-ng][DeutscheBankAG][bing_ip] > use recon/hosts-hosts/resolve
[recon-ng][DeutscheBankAG][resolve] > run
[*] finanzberater.deutsche-bank.de => 160.83.8.129
[...]
and then reverse resolve the IP’s to figure out what else is hosted there:
[recon-ng][DeutscheBankAG][resolve] > use recon/hosts-hosts/reverse_resolve
[recon-ng][DeutscheBankAG][reverse_resolve] > run
[*] [host] finanzberater.tec.db.com (160.83.8.129)
[*] [host] deutschebank.tec.db.com (160.83.8.144)
[*] [host] www.firmenkunden.db.com (160.83.59.50)
[...]
Again, you might pick up services that do not belong to your target’s company directly. But very likely, those external services are being used by your target, so they provide an interesting piece of information as well.
If we were really up to evaluate the security of Deutsche Bank AG network, at this step we could pick out some of the more interesting domain names and fire up nmap. But that is not what we will do here.
Looking at the results, we notice that a few new domains appeared on our list, e.g. db.com. We add that to our domains table with the help of one of the migratemodules. Those modules simply move data from one table to another.
[recon-ng][DeutscheBankAG][reverse_resolve] > use recon/hosts-domains/migrate_hosts
[recon-ng][DeutscheBankAG][migrate_hosts] > run
[*] [domain] deutsche-bank.de
[...]
[*] [domain] db.com
[*] [domain] firmenkunden.db.com

-------
SUMMARY
-------
[*] 6 total (5 new) domains found.
We now have a small list of interesting domains. We might query common public databases for vulnerabilities:
[recon-ng][DeutscheBankAG][punkspider] > use recon/domains-vulnerabilities/xssed
[recon-ng][DeutscheBankAG][xssed] > run

----------------
DEUTSCHE-BANK.DE
----------------
[*] Category: XSS
[*] Example: http://search.deutsche-bank.de/search/search?lang=en&template=53&topic=1433349707&targetframe=_top&s<br>ortspec='%22--%3E%3Cscript%3Ealert(/w0Ot/)%3C/script%3E
[*] Host: search.deutsche-bank.de
[*] Publish_Date: 2010-09-06 00:00:00
[*] Reference: http://xssed.com/mirror/69088/
[*] Status: fixed
[*] --------------------------------------------------

[...]
------
DB.COM
------
[*] Category: XSS
[*] Example: http://www.imdb.com/name/nm1083271/mediaindex?page=2"></a><script>alert(1);</script>
[*] Host: www.imdb.com
[*] Publish_Date: 2012-04-01 00:00:00
[*] Reference: http://xssed.com/mirror/62249/
[*] Status: fixed
[*] --------------------------------------------------
[*] Category: XSS
[*] Example: http://www.imdb.com/find?q=xss&pg=tvschedule"><script>alert(document.cookie)</script>
[*] Host: www.imdb.com
So there is one fixed XSS vulnerability on db.com, nothing of interest right now. But what else happened? We also “discovered” a lot of non-related vulnerabilites due to the wildcard search done by recon-ng. Let’s make use of the query command to clean this up:
[recon-ng][DeutscheBankAG][xssed] > query DELETE FROM vulnerabilities WHERE host LIKE '%db.com%'
[*] 20 rows affected.
Done. Let’s go another route and query for interesting filetypes, since recon-ng also provides a module for that:
[recon-ng][DeutscheBankAG][xssposed] > use recon/domains-contacts/metacrawler
[recon-ng][DeutscheBankAG][metacrawler] > run

----------------
DEUTSCHE-BANK.DE
----------------
[*] Searching Google for: site:deutsche-bank.de filetype:pdf OR filetype:docx OR filetype:xlsx OR filetype:pptx OR filetype:doc OR filetype:xls OR filetype:ppt
[*] https://deutsche-bank.de/ethikkodizes
[*] https://www.deutsche-bank.de/solarimpulse/downloads/Bulletin_13_mit_Einlagen_neu.pdf
[*] 2 files found on 'deutsche-bank.de'.

-----------------------------
FIRMENKUNDEN.DEUTSCHE-BANK.DE
-----------------------------
[*] Searching Google for: site:firmenkunden.deutsche-bank.de filetype:pdf OR filetype:docx OR filetype:xlsx OR filetype:pptx OR filetype:doc OR filetype:xls OR filetype:ppt
[*] http://www.firmenkunden.deutsche-bank.de/docs/Code_of_Conduct_Okt2005_DE.pdf
[*] 1 files found on 'firmenkunden.deutsche-bank.de'.
[...]
Again, nothing spectacular here. You should have an idea now how recon-ng works. There are many more interesting modules to explore. And if you get bored, bruteforce for typical subdomains, which nearly always yields interesting results. Netcraft and Hackertarget are also often quite interesting. Try to find the corresponding modules with the search command and test them out.
Note that when doing OSINT you often have to step back and query the same sources with new information. For example, when finding new related hostnames through hackertarget, we could go back to resolve those hosts and then again reverse-resolve new IPs to see if we find even more hostnames.
So much for the technical knowledge we can gather about our target. Now let’s figure out what we can find out about people working for Deutsche Bank AG.
Use it on people
In my opinion, OSINT always starts to get creepy, when you begin scanning employee data. I will keep this to a minimum here. On the other hand, this kind of information is often as valuable as all the technical details. Want to get info about a company? Ask their employees. Want to get access to their network? Get some names and email adresses and start phishing, spear-phishing or even whaling. Build up a fake facebook profile and start making new friends. But what are valuable targets? It’s not a bad idea to start with a bulk scan to figure that out. Let us see what we can achieve with recon-ng.
We start with quering some whois info:
[recon-ng][DeutscheBankAG][metacrawler] > use recon/domains-contacts/whois_pocs
[recon-ng][DeutscheBankAG][whois_pocs] > run
[...]
[*] 116 total (87 new) contacts found.
This should yield some contacts for db.com and many false positives for unrelated domains. Get rid of them via SQL again:
query DELETE FROM contacts WHERE email NOT LIKE '%@db.com'
Your queries will become more sophisticated if your dataset gets more diverse. If you inspect your contacts table (show contacts) you will find that you already got 20 valid results, including full name, email, region and country information. Nice! But there is more.
Since we added “Deutsche Bank AG” as contact info, let’s query Indeed:
[recon-ng][DeutscheBankAG][whois_pocs] > use recon/companies-contacts/indeed
[recon-ng][DeutscheBankAG][indeed] > run
-------

SUMMARY
-------
[*] 50 total (50 new) profiles found.
[*] 50 total (48 new) contacts found.
Wow! That filled our contacts and profiles table already nicely and we got a lot of infos. You might also want to query LinkedIn, but unfortunately that requires an API key. Again, check the recon-ng website on info about how to get one.
Since Deutsche Bank AG is a german company and in Germany (D-A-CH, to be precise) XING is pretty big, I wrote a simple XING plugin to query employee info from this network. It often even works without getting a XING account. You can get the plugin from here: https://github.com/mhelwig/xing_employees. It’s quite experimental, often dies because of special characters and correct parsing of names is not trivial so feel free to adapt it to your needs.
The plugin queries by default a maximum of 500 employees per letter and imports data into contacts and profiles tables. Running it on Deutsche Bank AG leads to an error, but it still results in an impressive amount of info:
[recon-ng][DeutscheBankAG] > use recon/companies-multi/xing_employees
[recon-ng][DeutscheBankAG][xing_employees] > run
[...]
-------
SUMMARY
-------
[*] 1301 total (1301 new) profiles found.
[*] 1300 total (1295 new) contacts found.
Great! You now have names of quite a decent amount of people working for our target. Since we can observe in the contacts table that the typical email pattern is Firstname.Lastname@db.com we can try to guess the missing emails. recon-ng offers another module for that:
[recon-ng][DeutscheBankAG][hibp_breach] > use recon/contacts-contacts/mangle
[recon-ng][DeutscheBankAG][mangle] > show info

      Name: Contact Name Mangler
      Path: modules/recon/contacts-contacts/mangle.py
    Author: Tim Tomes (@LaNMaSteR53)

Description:
  Applies a mangle pattern to all of the contacts stored in the database, creating email addresses or
  usernames for each harvested contact. Updates the 'contacts' table with the results.

Options:
  Name        Current Value  Required  Description
  ----------  -------------  --------  -----------
  DOMAIN                     no        target email domain
  MAX-LENGTH  30             yes       maximum length of email address prefix or username
  OVERWRITE   False          yes       overwrite existing email addresses
  PATTERN     <fn>.<ln>      yes       pattern applied to mangle first and last name
  SOURCE      default        yes       source of input (see 'show info' for details)
  SUBSTITUTE  -              yes       character to substitute for invalid email address characters

Source Options:
  default        SELECT rowid, first_name, middle_name, last_name, email FROM contacts ORDER BY first_name
  <string>       string representing a single input
  <path>         path to a file containing a list of inputs
  query <sql>    database query returning one column of inputs

Comments:
  * Pattern options: <fi>,<fn>,<mi>,<mn>,<li>,<ln>
  * Example:         <fi>.<ln> => j.doe@domain.com
  * Note: Omit the 'domain' option to create usernames

[recon-ng][DeutscheBankAG][mangle] > set DOMAIN db.com
DOMAIN => db.com
[recon-ng][DeutscheBankAG][mangle] > run
Fun, isn’t it? Of course, when doing real OSINT, you would verify the pattern a little more thoroughly, e.g. by browsing your targets website and documents, but I skip this step here. As you will also notice, there are many invalid adresses that resulted from our merge and in a real report, we would have to clean up again.
We now could start checking common databreaches for those emails. HaveIBeenPwned allows us to query it with recon-ng:
[recon-ng][DeutscheBankAG][mangle] > use recon/contacts-credentials/hibp_breach
[recon-ng][DeutscheBankAG][hibp_breach] > run
[*] saul.adler@db.com => Not Found.
[!] TypeError: 'NoneType' object is not iterable.
[recon-ng][DeutscheBankAG][hibp_breach] >
What happened? Again, an error. When dealing with names you will probably get many errors because of the diverse data format and special characters. The second email address in our contacts table contains two dots, maybe that is the problem. Let’s just skip it and many others containing special characters (the list is not complete) with an extensive SQL query and by making use of the SOURCE option this and many other recon-ng modules provide:
[recon-ng][DeutscheBankAG][hibp_breach] > set SOURCE query SELECT email FROM contacts WHERE email NOT LIKE '%-%' AND email NOT LIKE '%ä%' AND email NOT LIKE '%ü%' AND email NOT LIKE '%ö%' AND email NOT LIKE '%ç%' AND email NOT LIKE '%á%' ORDER BY email ASC
SOURCE => query SELECT email FROM contacts WHERE email NOT LIKE '%-%' AND email NOT LIKE '%ä%' AND email NOT LIKE '%ü%' AND email NOT LIKE '%ö%' AND email NOT LIKE '%ç%' AND email NOT LIKE '%á%' ORDER BY email ASC
[recon-ng][DeutscheBankAG][hibp_breach] > run
Recon-ng now took the results of our query as its input and yielded better results. If we were an attacker, we could try to get access to the identified breaches and hope that the affected users have reused their passwords in other contexts. Note that we also find out if users tend to use their company email in other services (Adobe, LinkedIn, etc.) where we might look for further information specifically.
Want to figure out more about the social media activities of your users? Try the ‘profiler’ module. To work, it needs a list of plausible usernames (which we haven’t got at the moment). Since recon-ng does not offer a handy module for username generation [EDIT: AS @WebBreacher pointed out, it does. Check recon/contacts-contacts/mangle], this would be the time to leave recon-ng and work with the database directly to construct something on your own. Here is a simple generation scheme, again using sqlite:
[recon-ng][DeutscheBankAG][profiler] > set SOURCE query SELECT DISTINCT lower(contacts.first_name || contacts.last_name) as username FROM contacts WHERE first_name IS NOT NULL AND last_name IS NOT NULL AND module LIKE 'xing_employees'
SOURCE => query SELECT DISTINCT lower(contacts.first_name || contacts.last_name) as username FROM contacts WHERE first_name IS NOT NULL AND last_name IS NOT NULL AND module LIKE 'xing_employees'
[recon-ng][DeutscheBankAG][profiler] > run
[*] Retrieving https://raw.githubusercontent.com/WebBreacher/WhatsMyName/master/web_accounts_list.json...

Looking Up Data For: Laurafernandez
-----------------------------------
[*] Checking: about.me
[*] Checking: AdultFriendFinder
[*] Checking: Matchdoctor
[*] Checking: aNobil
[*] Checking: Atlassian
[*] Checking: Atlassian Self-Signup
[...]
Recon-ng retrieves a list of various webservices and starts querying our constructed usernames against these services. You might generate a lot of false positives here and you should probably only use this kind of query if you already narrowed down on your targets. Also be aware that you should use this kind of information with caution, whether it is valid or not. You can bring people in very unlucky situations when you claim to their boss that they have an account on AdultFriendFinder or similar sites, whether or not this is true.
There is a lot more to discover and there are many ways to gather data. We also notice that there is a limit of what we can easily achieve. For getting valid data, there is still a lot of manual work involved to clean and combine the pieces of information we gather. Often, its enough in to bulk process your data in a not so clean way to still come out with thousands of valid results.
To bring our short examination to an end, let’s generate a basic report:
[recon-ng][DeutscheBankAG][profiler] > use reporting/html
[recon-ng][DeutscheBankAG][html] > set CUSTOMER "Deutsche Bank AG"
CUSTOMER => "Deutsche Bank AG"
[recon-ng][DeutscheBankAG][html] > set CREATOR "@c0dmtr1x"
CREATOR => "@c0dmtr1x"
[recon-ng][DeutscheBankAG][html] > run
[*] Report generated at '/root/.recon-ng/workspaces/DeutscheBankAG/results.html'.
That’s it. Have fun with recon-ng and your next OSINT tasks!